Reprap Prusa 3D Printer Enclosure kit
₹3,500.00
We love our Reprap Prusa 3D printer, however there have been many times when the prints have been warped due to uneven cooling or drafts in the room make it hard for the the bed to heat up.

- Description
- Additional information
Description
Reprap Prusa 3D Printer Enclosure kit. |
||
 |
||
| Note : 3D Printer shown in picture is not included | ||
 We love our Reprap Prusa 3D printer, however there have been many times when the prints have been warped due to uneven cooling or drafts in the room make it hard for the the bed to heat up. We love our Reprap Prusa 3D printer, however there have been many times when the prints have been warped due to uneven cooling or drafts in the room make it hard for the the bed to heat up.
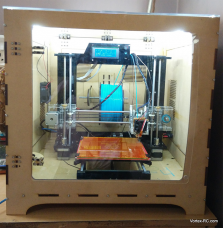
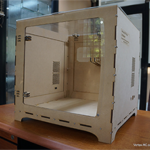
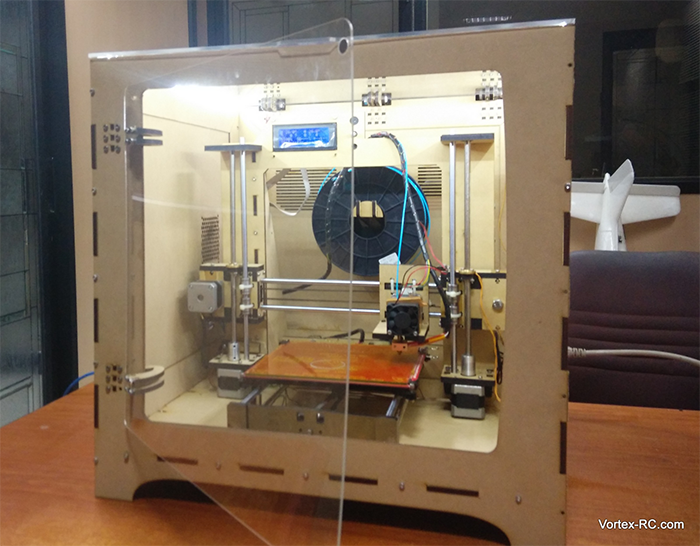
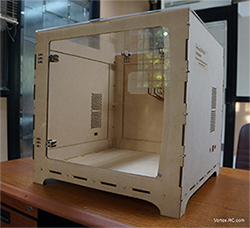
We bring forth, our custom designed 3D printer enclosure, specially suited for Reprap Prusa i3 3D Printers. With inside dimensions of 500mmx500mmx420mm, this enclosure should fit almost all of the standard Reprap Prusa 3D Printers, and attempts to solve the above issues, plus of course make your printer stand out and look extra cool! |
||
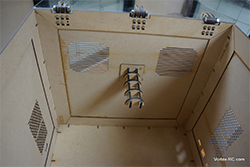
 Also featuring an internal Spool holder, which makes the printer very compact and neat looking on the desk. Also featuring an internal Spool holder, which makes the printer very compact and neat looking on the desk.
Fan grills are provided to keep the insides cool, and strategically placed near the usual placement of power supply and arduino / Ramps. In addition to this, holes for standard 80mm fans have been pre-drilled to allow for super easy installation, as and when required. |
||
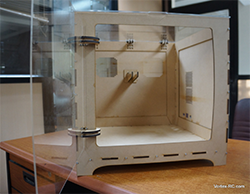
 A high quality openable clear acrylic top allows unobstructed views to the print and the display inside. The clear front door also swivels opens to allow for easy removal of printed parts. A high quality openable clear acrylic top allows unobstructed views to the print and the display inside. The clear front door also swivels opens to allow for easy removal of printed parts.
Power panel on the side, allows for easy plugging/unplugging of the printer using a standard computer power port, and a On-Off switch. |
||
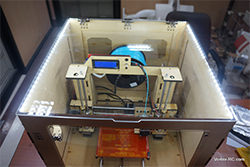 Included LED lights illuminate the interiors making it easy to examine prints or do fine adjustments easily. Included LED lights illuminate the interiors making it easy to examine prints or do fine adjustments easily.
We bring forth, our custom designed 3D printer enclosure, specially suited for Reprap Prusa i3 3D Printers. With inside dimensions of 500mmx500mmx420mm, this enclosure should fit almost all of the standard Reprap Prusa 3D Printers, and attempts to solve the above issues, plus of course make your printer stand out and look extra cool! High quality stainless steel fasteners are provided for durability. Assembly takes less than an hour and an instructional manual is provided to ease the assembly process. |
||
A must have for anyone using a Reprap Prusa printer. |
||
Includes
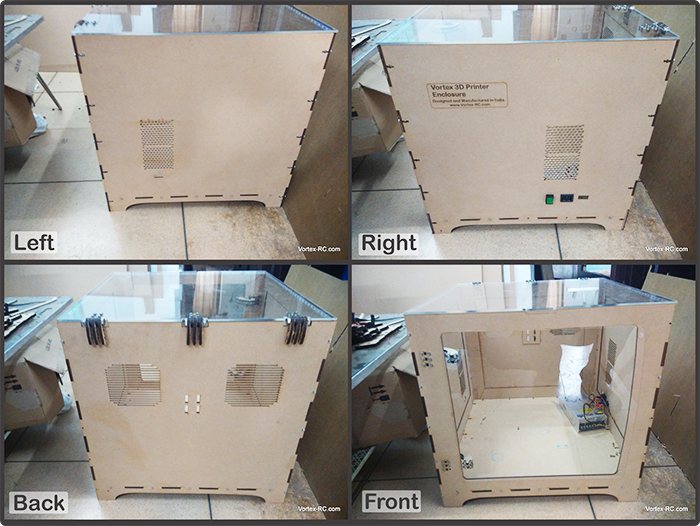
Click image to enlarge view
|
||
Features
|
||
Technical Specifications
|
||
Instructions
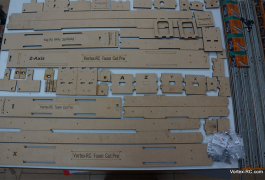
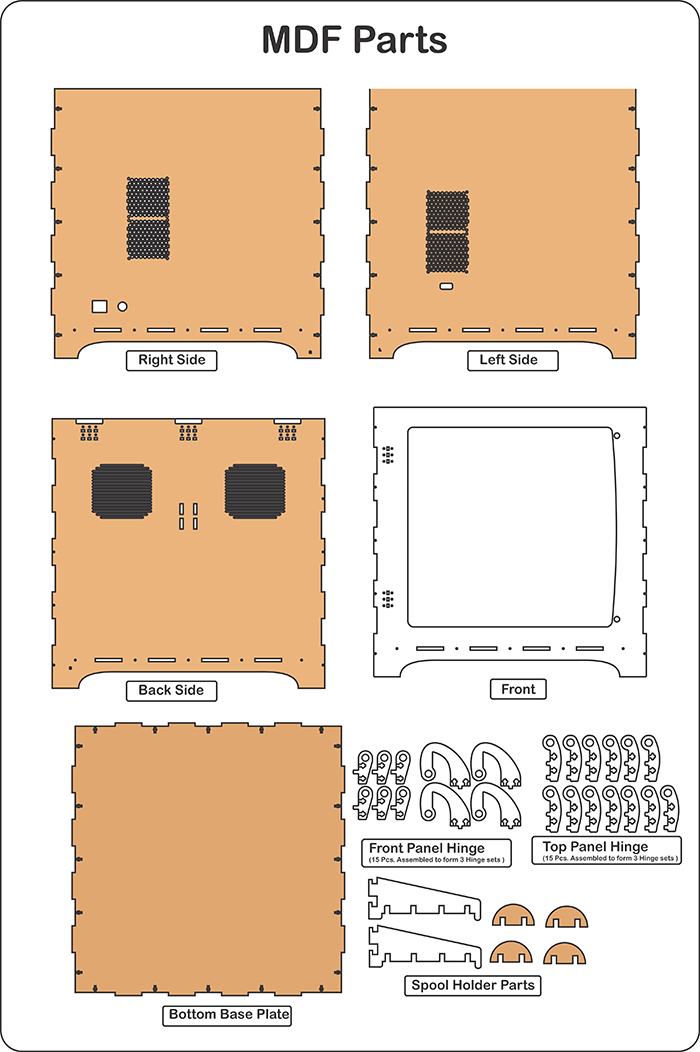
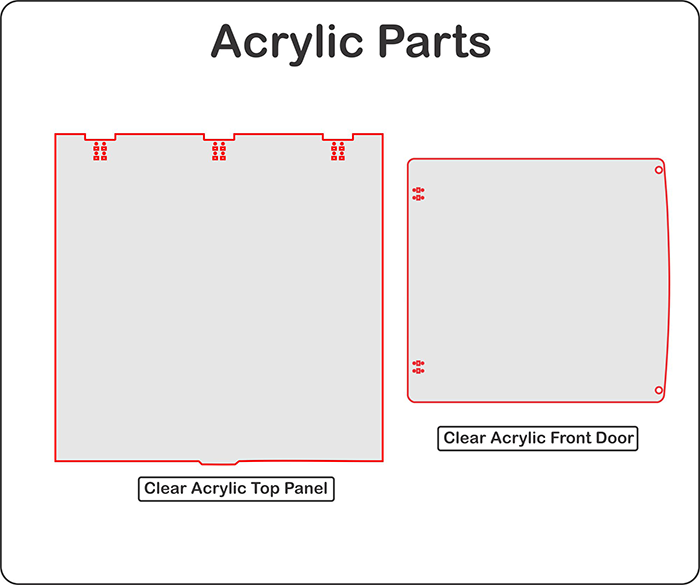
1. Identify, inspect and understand the Parts.Use the part list images below to identify the different MDF and Acrylic parts. The Left and Right MDF sides have a small R and L etched on to the sides to help identify. The acrylic plates have protective covering on both sides. Remove them at the end to help prevent scratches during the assembly process.
2. Assemble the MDF parts.
|
||
 a. Install the Left Wall to the Bottom Base plate Align the notches and install the left wall to the Bottom base plate. Use the 15MM Allen Bolts to secure the side. The nuts are slid into the notches and the allen bolts then tightened. a. Install the Left Wall to the Bottom Base plate Align the notches and install the left wall to the Bottom base plate. Use the 15MM Allen Bolts to secure the side. The nuts are slid into the notches and the allen bolts then tightened.
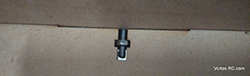
b. Install the Right Wall to the Bottom Base plate. c. Install the Back Wall to the Bottom Base plate. d. Install the front panel to the Bottom base plate. e. Similarly install the Right wall to the bottom base plate. Use 15 MM Allen bolts to secure the side. |
||
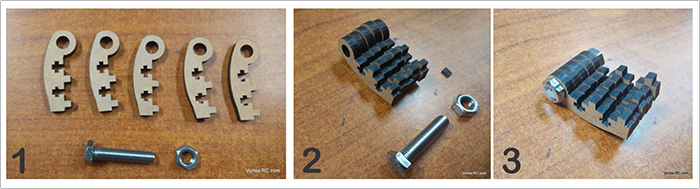
3. Assemble the MDF parts.There are 2 different hinge sets required : One for the Top panel and the other for the front door. The top panel requires 3 Hinges and is made of 15 similar pieces ( 5 piece per hinge ) |
||
 |
||
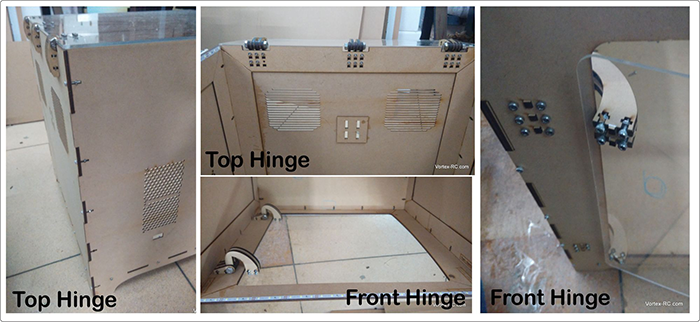
| Assembling the top Hinge | ||
| The front panel requires 2 hinges and is made up of 10 parts, 6 of one set and 4 of another type | ||
 |
||
| Assembling the front Hinge | ||
 |
||
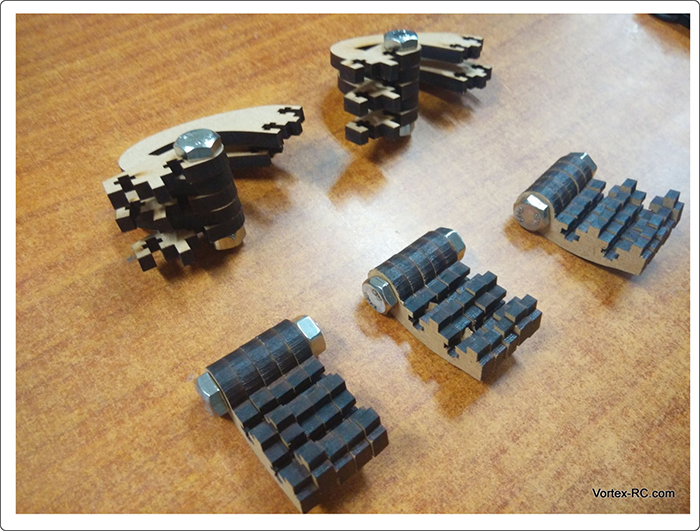
| Assembled Hinge Sets | ||
 |
||
4. Install the Clear acrylic Top panel. |
||
5. Install the hinges using 12MM Allen bolts to the back side of the box.Align and place the Top panel before using the 12MM allen bolts to tighten this up. DO not overtighten the bolts on the Acrylic, as excessive force can crack the acrylic. |
||
6. Install the front door.Likewise, install the front panel using thinges as shown below. |
||
7. Install the power socket and switch.You may like to solder the wires to the switch and socket before installing them in place. |
||
8. Install LED Lights
|
||
9. Put in your printer and enjoy ! |
||
 |
||
 |


Additional information
| Weight | 8 kg |
|---|